This week on our Home Makeover for Renters series, we’re taking a look at the bedroom, more specifically at the bedroom closet! I’m really excited about this project given that closets are my pet-peeve when it comes to organization. They never seem to stay organized no mater what I do. So it was obvious to me that that would be the first thing to get a makeover in our bedroom.
Here’s what our closet looked like before we started the project:
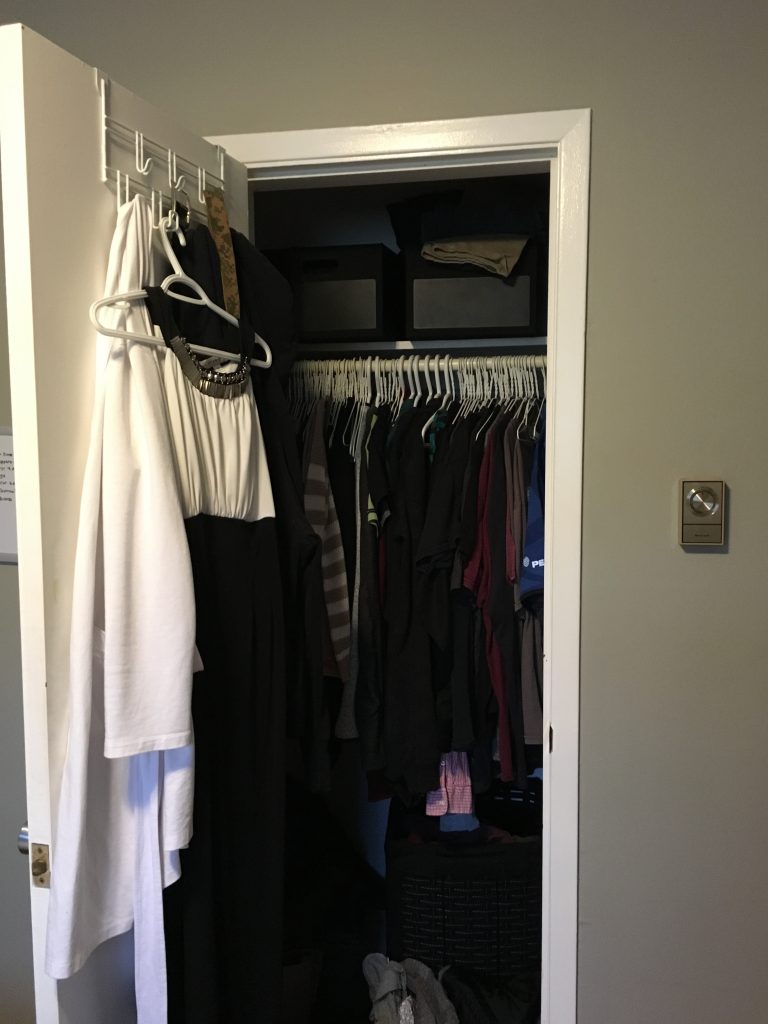
Previous closet layout:
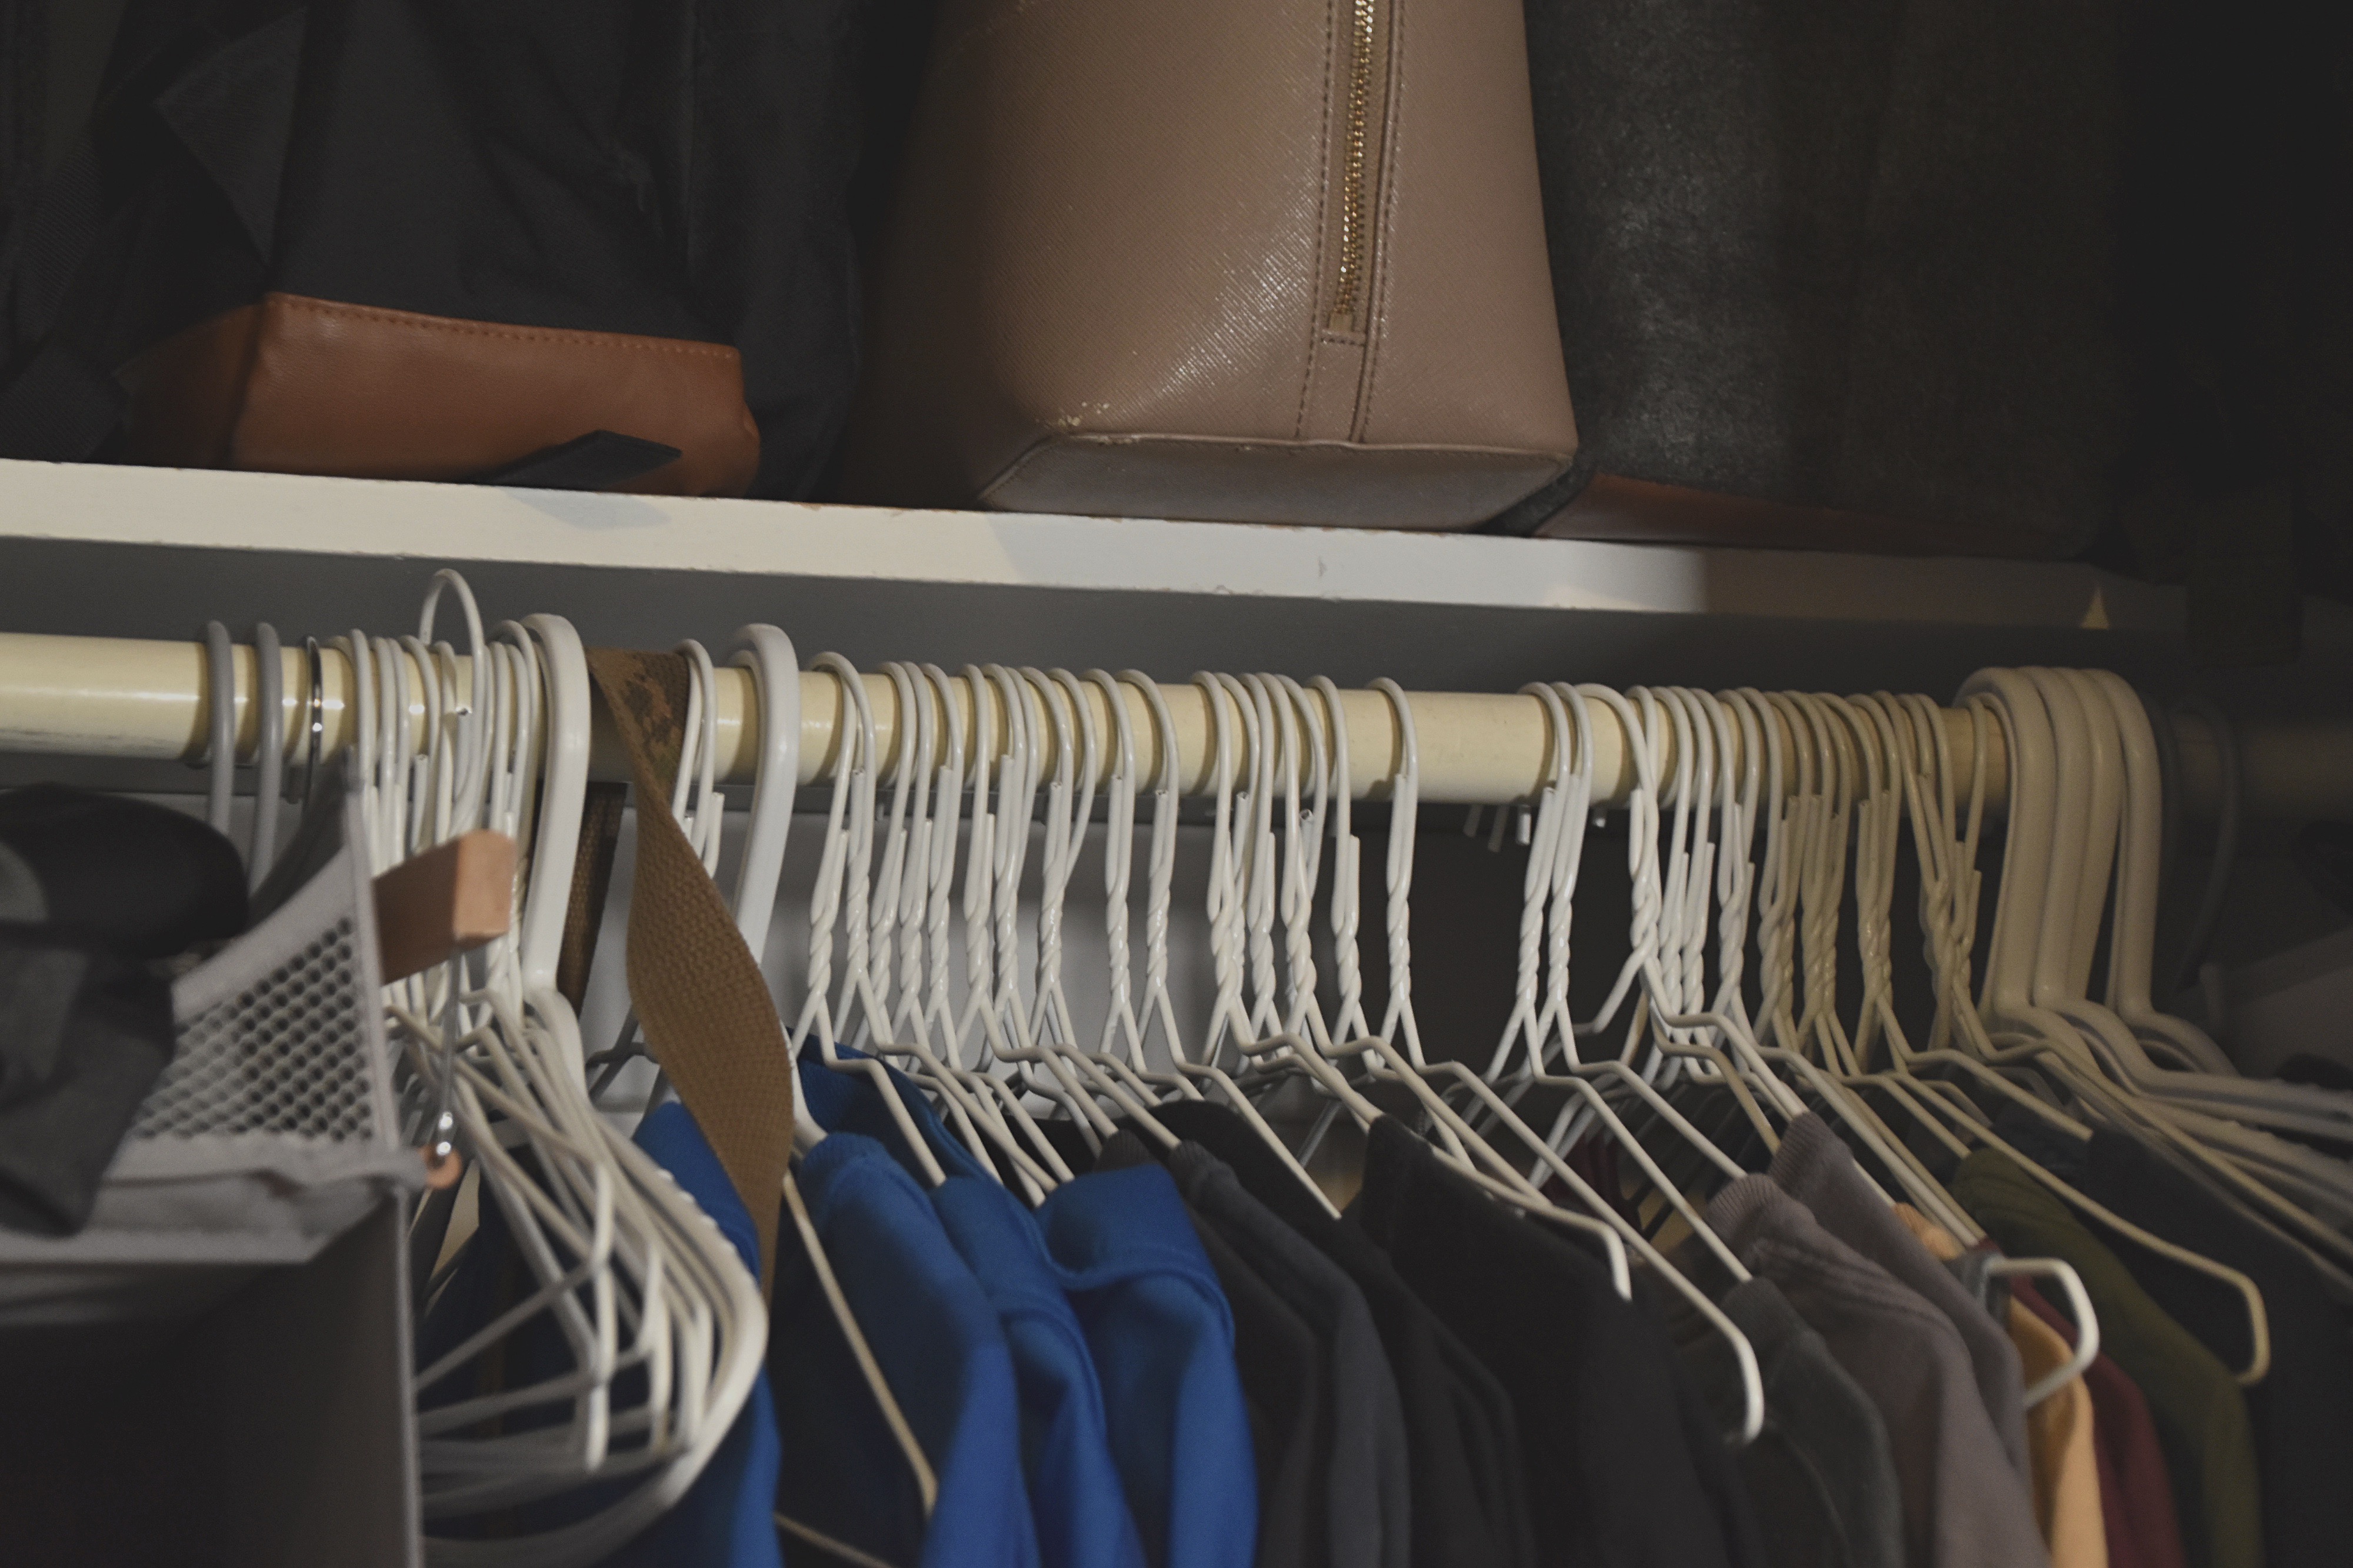
- Shirts & Dresses were hung on wire hangers – all my clothes on the left, Max’s clothes on the right.
- All pants were folded and stored in the black bins located on top shelf. Very difficult for me to reach.
- Also on the top shelf was a milk crate filled with old shirts and sweaters we were keeping for old time’s sake.
- There was a short organizer hanging from the clothing rod which didn’t contain much because it couldn’t support very much weight.
- The hamper was on the floor in the closet, usually tucked into the right side because all of our book bags and my purses cluttered the floor on the left side.
- And as you can see, many random articles of clothing are hanging from some extra hooks on the back of the closet door.
The first step was clear: I needed to do some decluttering.
This should always be your first step because there’s no point in organizing things you’re going to get rid of. And I went Marie Kondo style for this decluttering project! If you haven’t read her book The Life Changing Magic of Tidying Up, you definitely should. It’s a completely different approach to decluttering and organizing your life. The author is strongly against tidying room by room, but explains that it is best done according to categories. More on that in my book review, but for now, I’ll just mention that the first category is clothing, so that’s exactly what I did.
I laid out every single item of clothing that I own in the living room (there’s way more space in there). I made sure to bring bins and bags in the living room as well, because I knew I would have a lot of items to donate. The purpose of decluttering according to Marie Kondo is to only keep the things that bring you joy. So basically, if you don’t love something, you shouldn’t be keeping it.
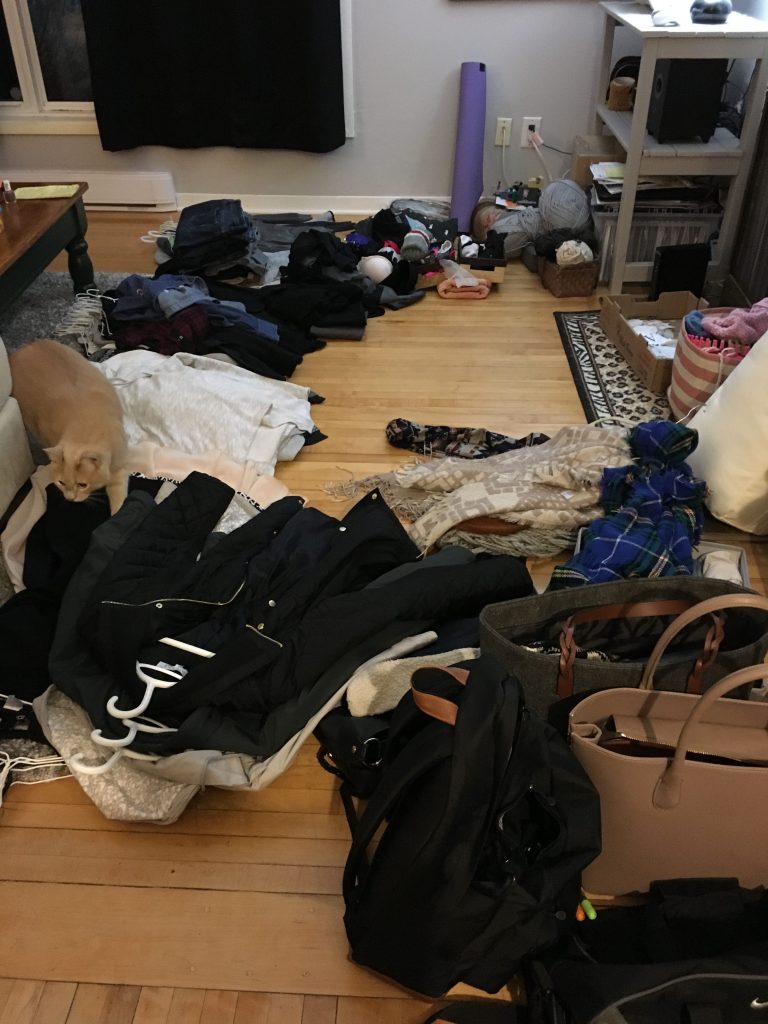
I held every belonging in my hands, one by one, and asked myself how I felt about it. If it no longer served a purpose to me, it was placed in a bag to be donated. If I wasn’t sure, I made a small “Maybe” pile, and those were usually items that I did like, but that I wasn’t sure fit in with the rest of my wardrobe. And of course, the items that I loved went next to the hanger to be hung back in the closet.
I even went a step further than just holding every piece of clothing. Unless I knew I really didn’t like an item, I would take every article and try it on. This was the best way to figure out what to do with my “Maybe” pile, so that I could judge how it looked on me, and how it looked with other clothing I was going to keep.
It was a long arduous process but I finally got it done after a few hours. Only after getting rid of so much clothes did I realize that I had very specific tastes. Apparently, all of my go-to items are black, white, grey or taupe. Well there you have it, I now know how to shop for new clothes!
Through this process I also learned that I just don’t wear skirts and dresses that much. It was a hard goodbye, but it was necessary to let most of them go.
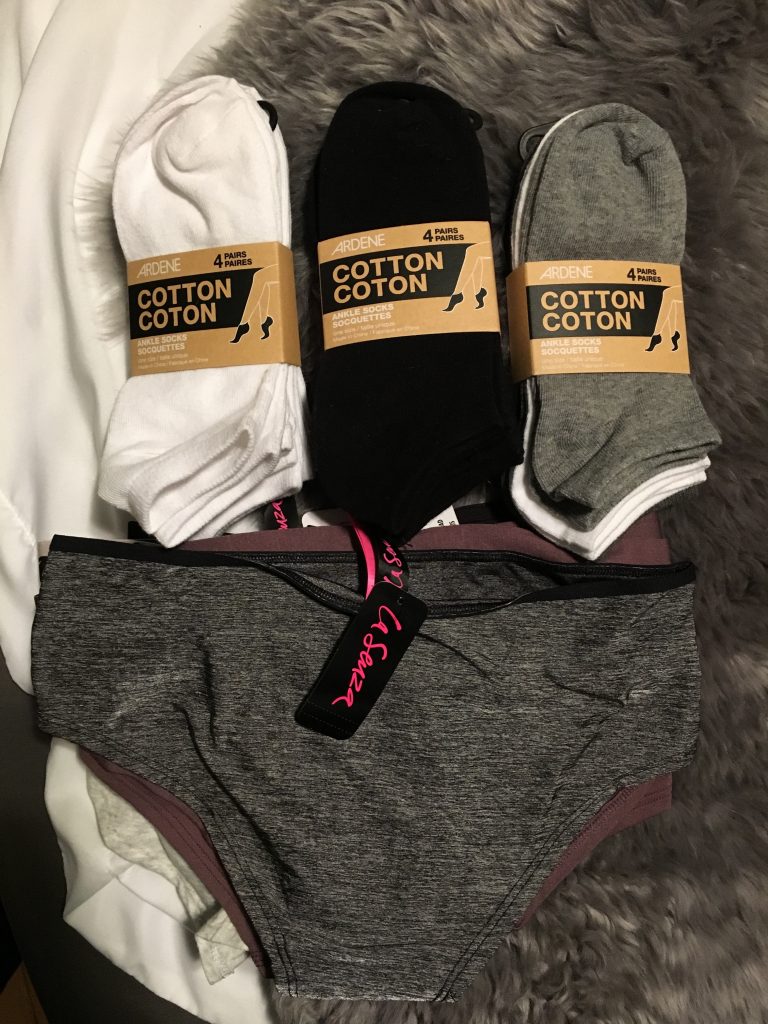
The easiest things to get rid of were definitely my underwear and socks. Honestly, I don’t ever remember purchasing socks for myself, ever. And I actually had to stop and think about where you could buys these. I tend to avoid shopping at Walmart, so I looked around the mall for somewhere else and found a great deal at Ardene’s. I also stopped in to La Senza (my fave!) to get a new set of underwear and I threw out everything that was in my drawer.
Next up: Closet Organization!
Organization things has been my favourite thing to do for as long as I can remember. I’m sad that it can’t be the first step, but everything needs to be done in a specific order so that organizing can be as efficient as possible.
When I first thought of the idea of doing the Home Makeover for Renters series, I immediately thought of a great DIY project I could do – build myself a portable closet organizer! The idea seemed so great, and I had an initial sketch already done up in my mind that would work perfectly for any closet. However, after thinking it through, it wouldn’t be useful for us in the Tiny House and it would be a big hassle to try to give that away.
Fortunately, I seemed to be in the right place at the right time. I stumbled upon this at Costco:
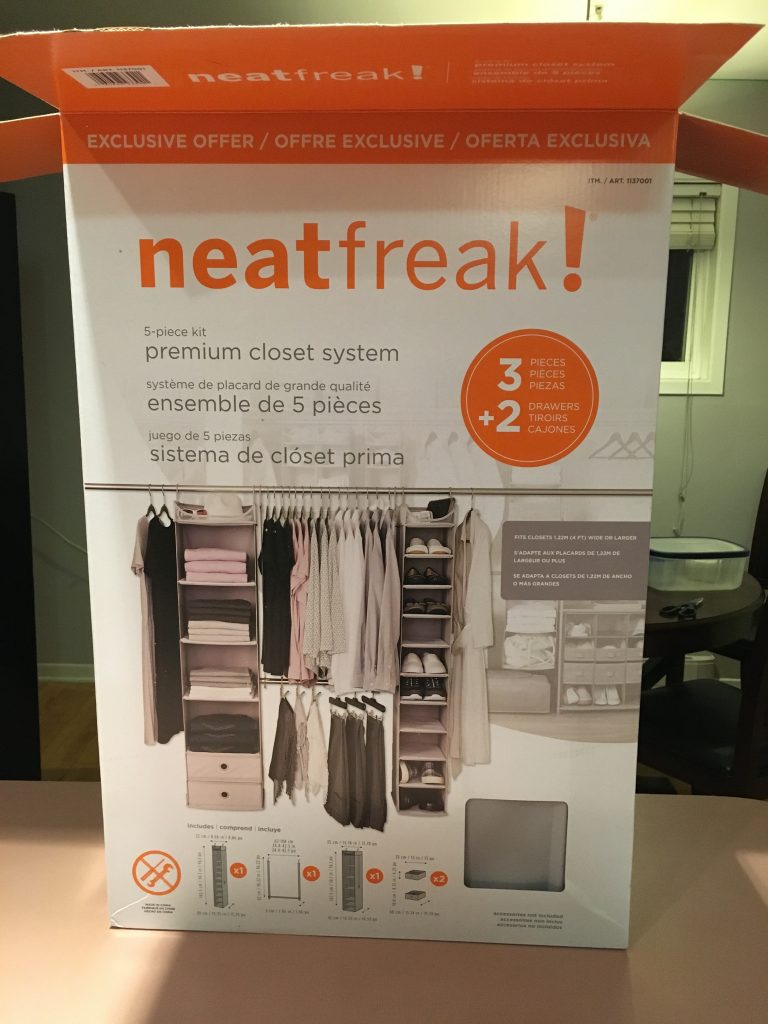
I am happy to say that that closet organizer has completed changed the way we use our closet space. We even managed to empty our dresser, and now every piece of clothing we own is in that closet! (Except for our jackets and boots, which are in the living room closet)
We won’t be revealing our bedroom closet just yet, but here’s a sneak peak of the work we did:
Please make sure to subscribe to our blog for more posts about our Home Makeover for Renters series!
Lots of work, bu so worth it when completed!
Yes, definitely! Thank God that the end results are constantly motivating us to get the work done!
[…] first thing I wanted to improve was our bedroom closet. It was not very functional and we were unable to make the most of the space. We were very […]